
Constructing Perpendicular Bisectors and Right Angles
Aim
To construct the perpendicular bisector of a line segment, and a 90° angle at a point on a line, with only a ruler and a compass — and to see why the construction works.
Apparatus
- Plain (unruled) sheets or a construction notebook
- An unmarked ruler (straight edge)
- A compass and a sharp pencil
- Eraser and coloured pencils
- A length of string or thin rope (about 1 m) and two pins or pegs
- A ruler with a scale and a protractor, to measure at the end
Procedure
- Draw a line segment XY on a plain sheet (6 cm first, then 8 cm and 10 cm).
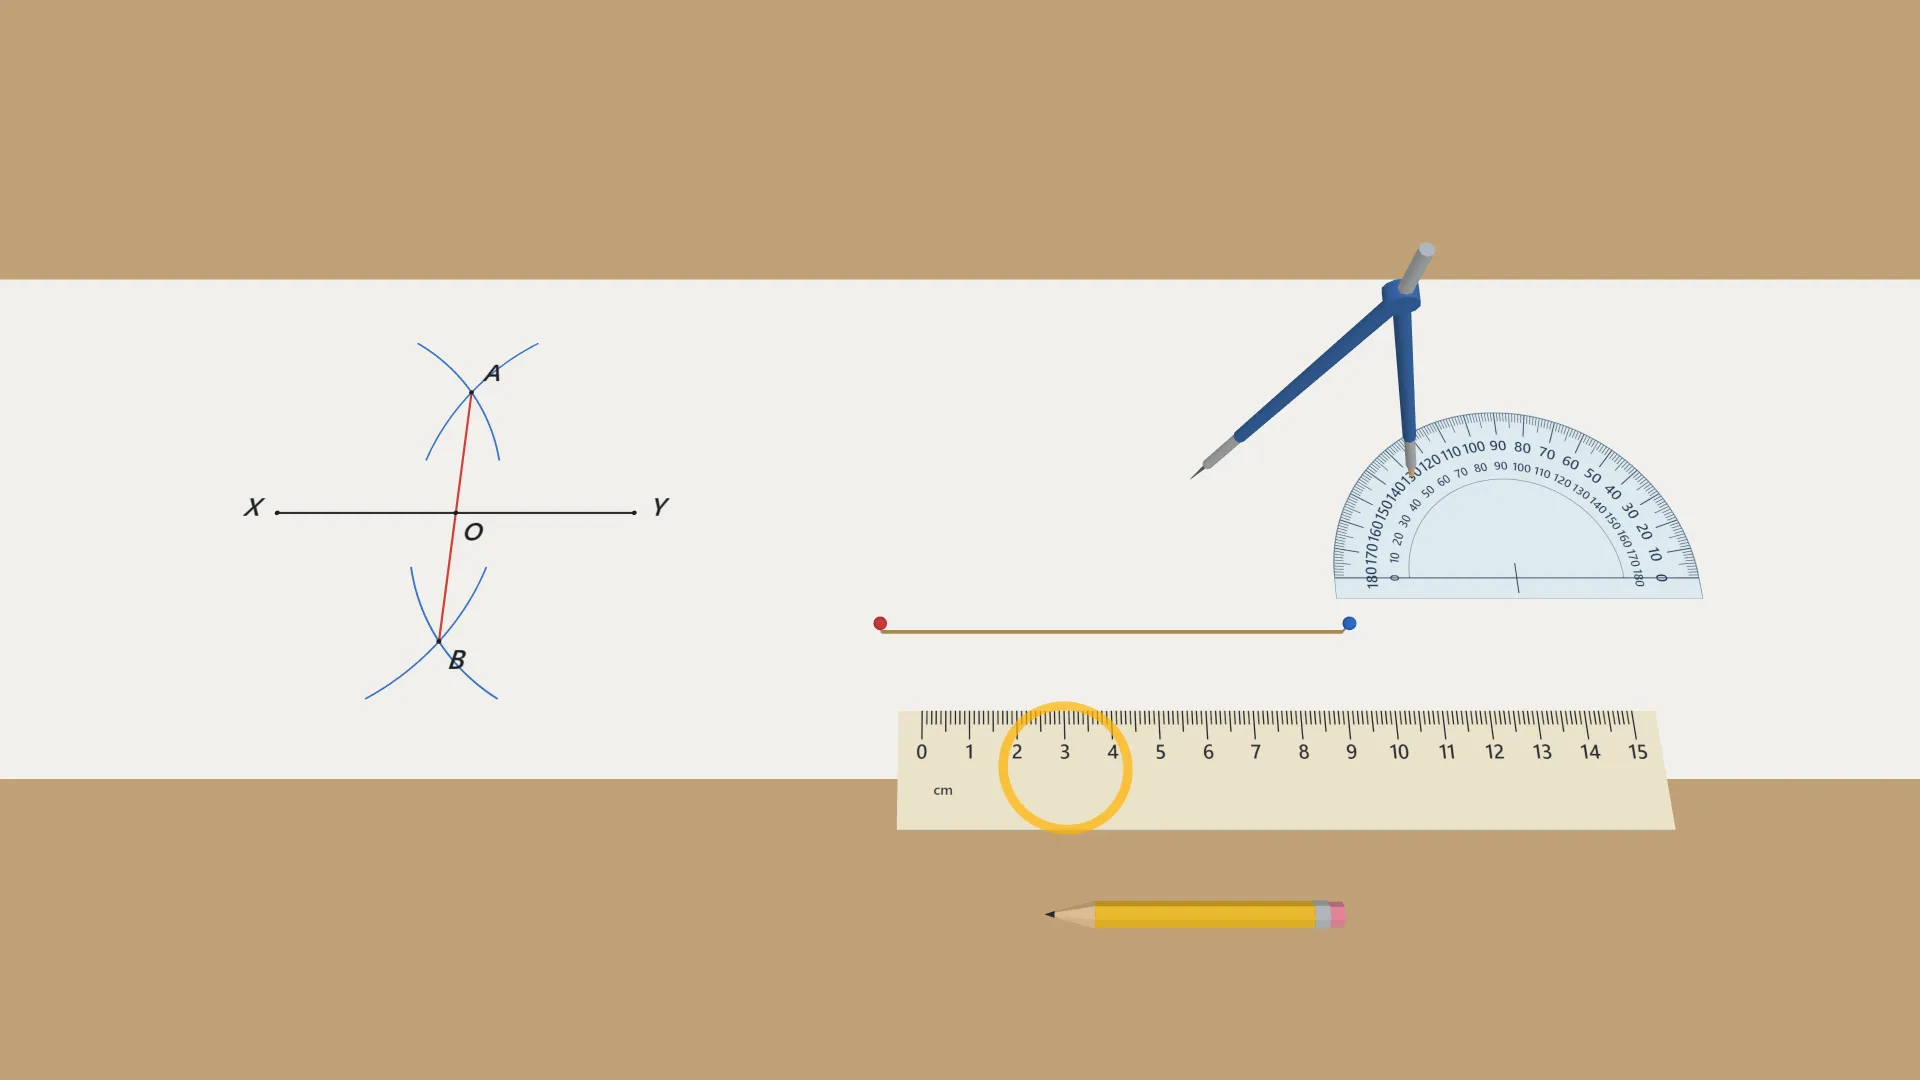
- Open the compass to more than half of XY. With centre X, draw arcs above and below XY.
- Same radius, centre Y, draw arcs that cut the first ones. Mark A (above) and B (below).
- Join A and B with the ruler. AB meets XY at O.
- Measure OX, OY and the angle at O. OX = OY and the angle is 90°, so AB is the ⊥ bisector.
- 90° at a point O on a line, mark X and Y equally far from O, then build the ⊥ bisector of XY.
- Rope method, peg a string at X and Y, stretch its midpoint above and below to mark A and B, join AB.
Interactive 3D Experiment
Loading simulation…
What to observe
- The arcs from X and Y cross at two points, A above and B below.
- AB cuts XY at its midpoint O (OX = OY) and at 90°, for every length of XY.
- Every point on AB is as far from X as from Y — that is why it works.
- The stretched string marks the same A and B as the compass, so it gives the same line.
Notes
- Math Spark: long before compasses were common, the Śulba-Sūtras described how a rope, fastened at two points and pulled taut above and below a line, marks its perpendicular bisector. Śulba means 'cord'.
- Open the compass to more than half of XY, otherwise the arcs will not meet.
- Keep exactly the same radius for the arcs from X and from Y.
- Make the arcs long enough to cut clearly above and below the segment.
- Do not erase the arcs — they show how the construction was made.
- Hold the compass by its handle and press the needle lightly.
- Use the protractor only at the end, to check the right angle, not to draw it.