
Growing the Koch Snowflake
Aim
Generate the first three steps of the shape sequence that leads to the Koch Snowflake, and discover how the number of sides and the perimeter grow at every step while the figure stays within a fixed boundary.
Apparatus
- Isometric (triangular) dot paper or plain white paper
- Ruler with millimetre markings, compass and protractor
- Sharp pencil, eraser and coloured pens (at least 3 colours)
- A piece of thin string about 1 metre long
- Scissors
Procedure
- Draw an equilateral triangle of side 9 cm. This is Step 0. Note its sides and perimeter.
- Divide each side into 3 equal parts. On the middle part raise an outward equilateral triangle, then rub out the middle part. This is Step 1.
- Count the sides of the star, measure one side and calculate the perimeter.
- Repeat the bump on every side of the star, in a new colour, to get Step 2.
- Enter the sides, side length and perimeter of each step in the observation table.
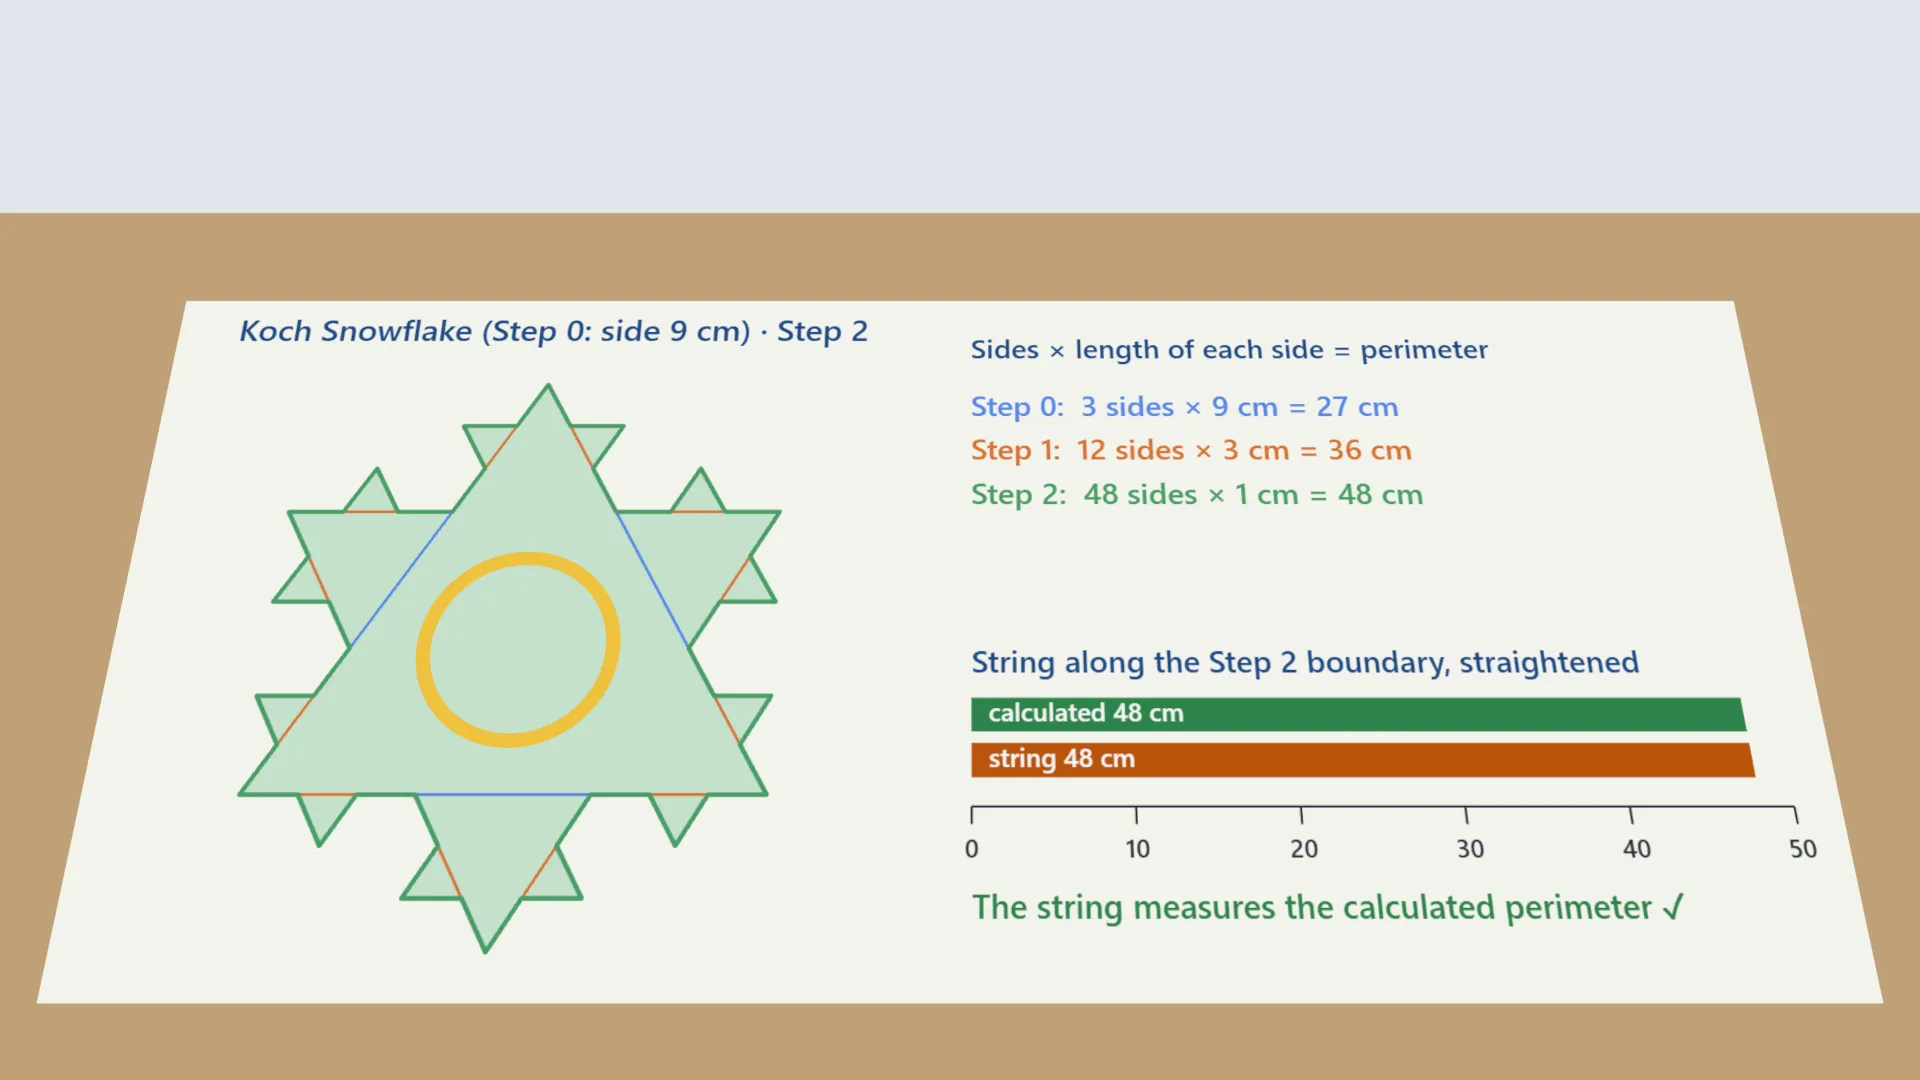
- Lay the string along the Step 2 boundary and straighten it against a ruler. Compare it with the perimeter you calculated.
- Draw the smallest circle around the Step 0 triangle. Check that Steps 1 and 2 fit inside it.
- Use the pattern to complete the row for Step 3 and the row for n.
- How can the boundary keep getting longer while the figure never leaves the circle?
Interactive 3D Experiment
Loading simulation…
What to observe
- Each step replaces every side by four sides, each one-third as long, so the sides go 3, 12, 48, 192: 3 × 4^n.
- The perimeter is multiplied by 4/3 each time (27, 36, 48, 64 cm), so it grows without limit.
- Yet the whole figure always stays inside the circle drawn around the original triangle: an unending boundary around a finite area.
Notes
- Math Spark: Helge von Koch described this curve in 1904 as a curve with a corner at every point, so a tangent can never be drawn to it. In 1967 Benoit Mandelbrot asked ‘How long is the coast of Britain?’ and showed that the answer depends on the length of the measuring stick: the smaller the stick, the longer the coastline.
- Divide each side into three exactly equal parts; measure with a millimetre ruler rather than judging by eye.
- Build the new equilateral bump outwards on the middle third, never inwards.
- Use the compass to make the two new sides equal to the middle third, and keep the compass setting unchanged for all bumps in a step.
- Erase the middle third after the bump has been drawn, so the figure has the correct number of sides.
- Complete every side of the figure before starting the next step.
- Start with a large triangle (at least 9 cm) so that Step 3 is still workable, and use a sharp pencil.
- Lay the string along the outline without stretching it, then straighten it against the ruler.
- Handle the compass point carefully and keep it capped when not in use.