
Building the Sierpinski Fractals
Aim
Construct the first steps of the Sierpinski Carpet and the Sierpinski Gasket, and discover the rules for the number of pieces that remain, the number of holes and the area left at each step.
Apparatus
- Square sheets of chart paper or graph paper (9 cm × 9 cm squares work best)
- An equilateral triangle of side 16 cm drawn on chart paper
- Ruler, sharp pencil and eraser
- Coloured sketch pens or crayons (at least 3 colours)
- Scissors and a glue stick
Procedure
- Draw a 9 cm × 9 cm square and colour it fully. This is Step 0 of the carpet.
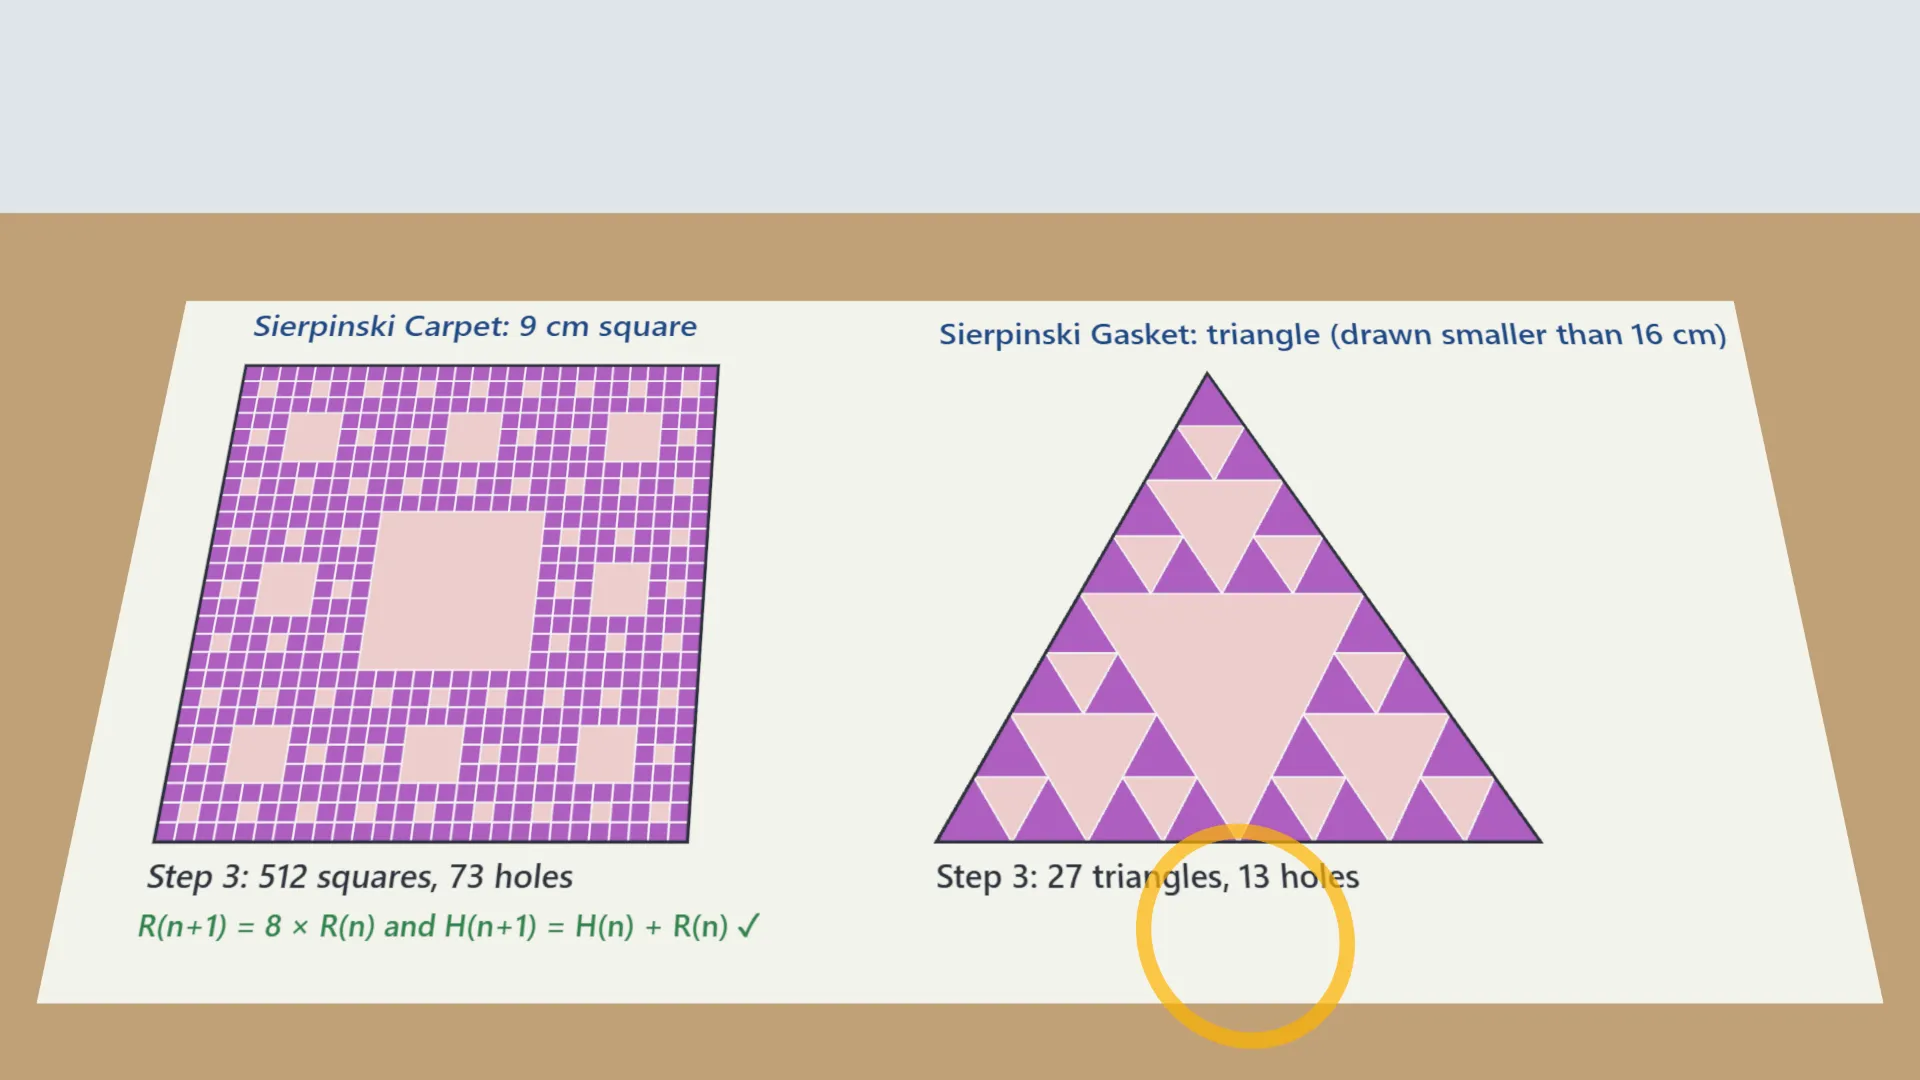
- Divide it into 9 squares of side 3 cm and leave the middle one blank (a hole). This is Step 1. Count the squares left.
- Divide each of the 8 squares into 9 and leave the middle one blank. This is Step 2. Count the squares and the holes.
- Record Rn and Hn in Table 1.1 and check Rn+1 = 8 Rn and Hn+1 = Hn + Rn.
- Take the equilateral triangle of side 16 cm. Join the midpoints of its sides and leave the middle triangle blank.
- Repeat on each of the 3 triangles for Step 2, with a fresh colour for every step. Record Table 1.2.
- Taking the area of the starting square and triangle as 1, find the fraction of area left after every step.
- If the process went on for ever, what would happen to the area? Would the figure still be visible?
Interactive 3D Experiment
Loading simulation…
What to observe
- Carpet: the squares left multiply by 8 each step (1, 8, 64, 512) and the area left is 8/9 of the step before.
- Gasket: the triangles left multiply by 3 each step (1, 3, 9, 27) and the area left is 3/4 of the step before.
- The holes grow: Hn+1 = Hn + Rn, while the area left shrinks towards zero, yet the figure never disappears.
Notes
- Math Spark: Sierpinski described his triangle in 1915, but the same pattern was laid in the marble floors of Italian churches more than 700 years earlier. The word ‘fractal’ was coined by Benoit Mandelbrot in 1975, from the Latin fractus, ‘broken’. At every step of the carpet 8/9 of the area survives, so after 30 steps less than 3% is left.
- Divide each side into three (or two) exactly equal parts with the ruler; unequal division destroys the self-similarity.
- Draw the construction lines lightly with a sharp pencil so that they can be erased later.
- Remove or shade only the middle piece at each step, never a corner piece.
- Complete one whole step for every piece before moving on to the next step.
- Shade all the removed pieces in the same colour so that the holes are easy to count.
- Start with a large enough figure (9 cm square, 16 cm triangle) so that Step 3 is still drawable.
- Count the remaining pieces, not the holes, for the pieces remaining column.
- Use scissors and glue carefully, and keep the cut-out pieces until the count has been recorded.