
Bisecting and Copying Angles
Aim
To bisect a given angle and to make an exact copy of an angle using only a ruler and a compass, and to use angle-copying to construct a pair of parallel lines.
Apparatus
- Plain sheets or a construction notebook
- An unmarked ruler and a compass
- A sharp pencil and eraser
- A protractor (only to check your answers)
- Coloured pencils
Procedure
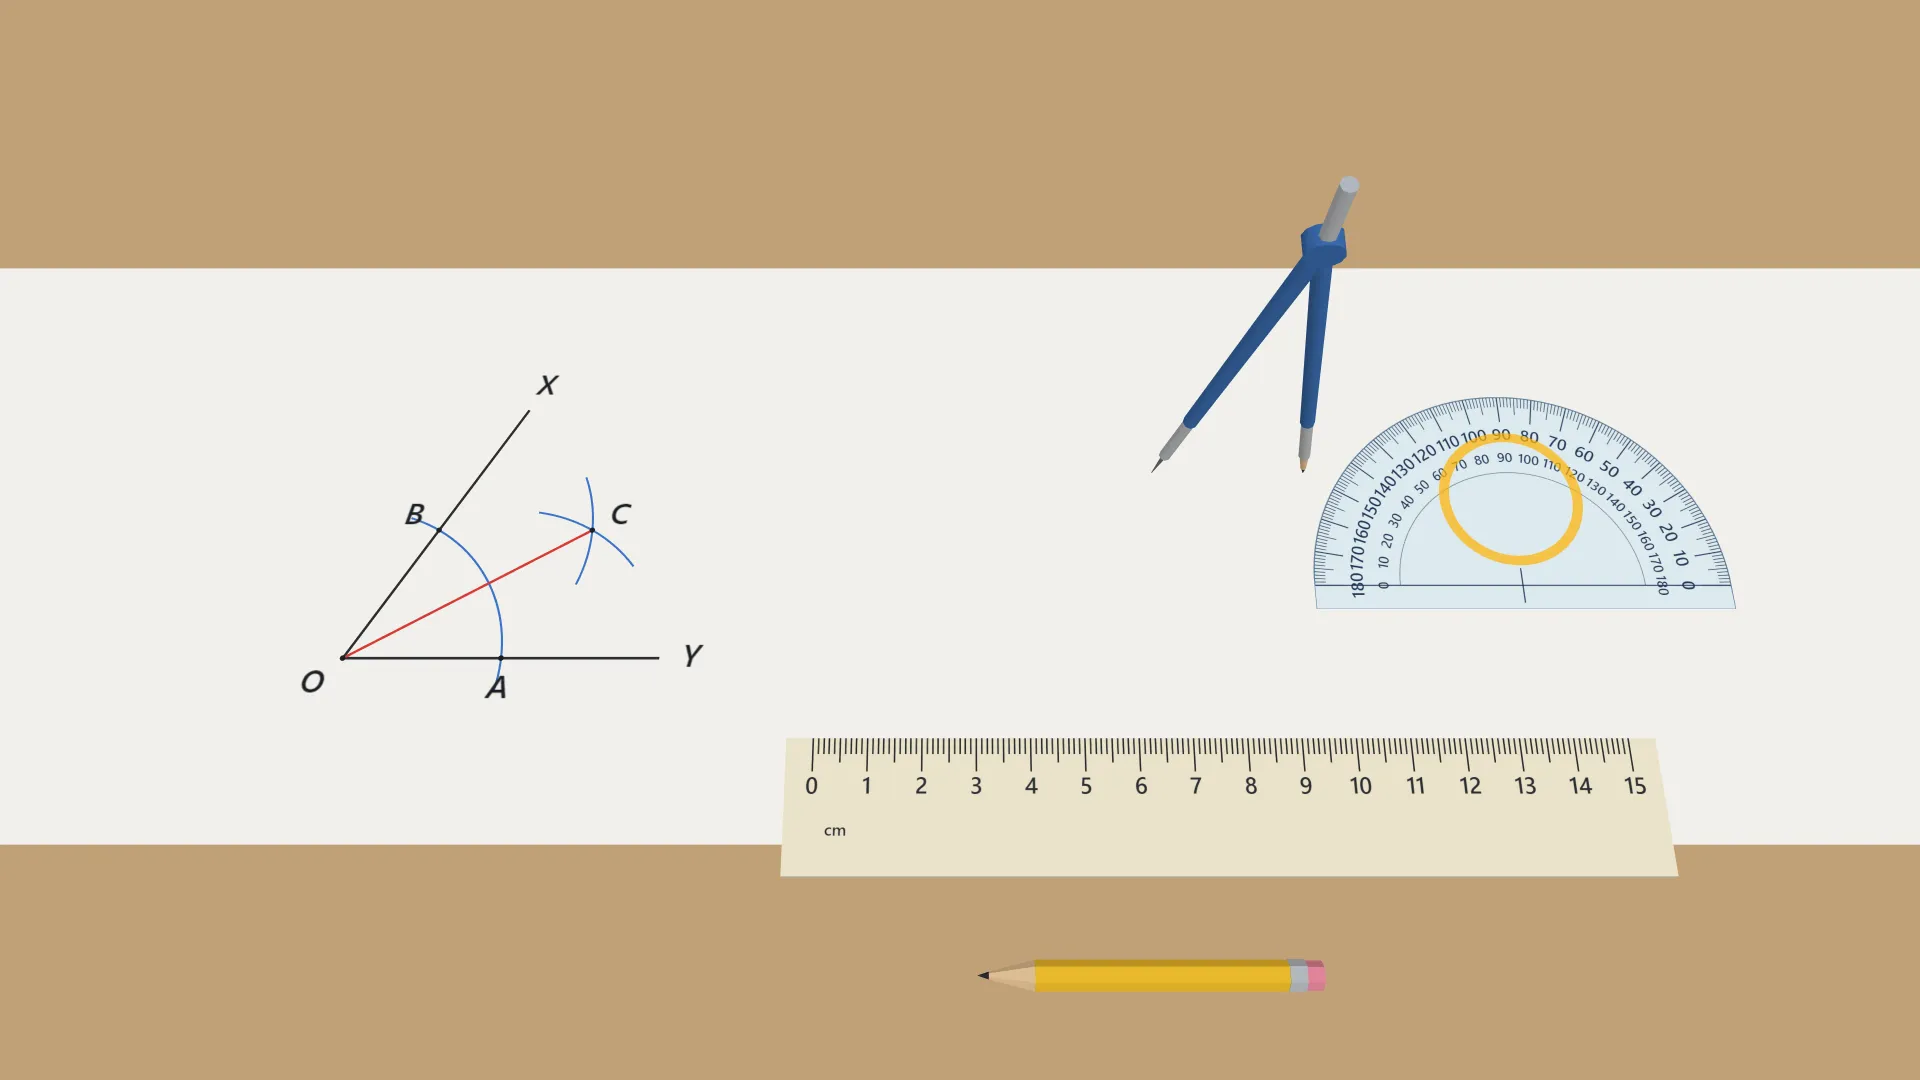
- Part A. ∠XOY is drawn. With centre O, cut both arms at A and B, so that OA = OB.
- With the same radius, draw arcs from A and B that cross at C.
- Join OC. It bisects ∠XOY. Measure ∠XOC and ∠COY to check they are equal.
- Bisect a 90° angle to get 45°, then bisect 45° again to explore 22.5°.
- Part B. With centre A, cut both arms at B and C. With the same radius and centre X, cut the ray at Z.
- Open the compass to BC. From Z, cut the arc at Y. Join XY.
- By SSS, ΔABC ≅ ΔXYZ, so ∠X = ∠A. Measure the copy at X and write the row.
- Part C. Line m and transversal l meet at A; B is on l. Copy the angle at A to B with the compass.
- Join B to Y. The new line n is parallel to m. Check the corresponding angles at A and B.
Interactive 3D Experiment
Loading simulation…
What to observe
- OC splits ∠XOY into two equal parts, ∠XOC = ∠COY, for every angle.
- The two halves add up to the original angle.
- An angle copied with ruler and compass is equal to the original (SSS).
- Equal corresponding angles at A and B give parallel lines m and n.
Notes
- Math Spark: bisecting and copying an angle rely on triangle congruence. Equal arcs secretly build congruent triangles, and equal corresponding parts do the rest. It is the same SSS/SAS reasoning that proves the perpendicular bisector works.
- Use the same radius when cutting both arms of the angle, so that OA = OB.
- Do not disturb the compass setting while transferring an arc from the original angle to the copy.
- Keep the arcs light but clearly visible, and mark intersection points with fine dots.
- Label the vertex and the arms of the copied angle in the same order as the original.
- Use the protractor only to verify the construction, never to make it.
- Keep the pencil sharp so the arcs cross at a single well-defined point.